I was planning on taking a break from Artificial Intelligence this month and looking at some more simple functions in photo editing, but it’s always difficult to be both topical, and also avoid a mention of current developments - in this case literally current developments
Last month I wrote about the stagnation of scanner technology, and that despite being around for several decades, there wasn’t any real progress in the software and the hardware. This was noticeable in the lack of any new models, or updates in capture software. I put this down to the fact that among a generation that conducts most of its activity on a mobile phone, there is not much need for a desk based scanner, and therefore with falling sales, a lack of investment in the product. Digging deeper the deeper, the actual truth is more complex.
Shortly after I wrote my column, and no doubt prompted by those mysterious algorithms which suggest topics you might be interested in, I started getting podcast rumours from photographers predicting that Epson were in fact phasing out production of some of their expensive top end scanners.
This was immediately challenged by an official statement from Epson but it was one that was more of a clarification than an actual denial. A bit like a football team announcing full confidence in the manager a week before they sack him. It seems the truth is not just the lack of sales, but the shortage of updated sensors which are the very source of the digital image. Scanners use a CCD device which is effectively dated since it was replaced in early digital cameras by a faster, cheaper CMOS.
Without getting into technicalities which frankly are beyond me, the difference is how efficiently they work. Most people think a digital camera captures a picture like film did, rather than electrical impulses. In fact all modern capture devices have a photosensitive pixel array which doesn't recognise colour but has individual red, green and blue filters that recognise light intensity and interpret the hue by process of elimination. Electrical impulses are then sent to a processor which turns the information into something that appears to be real for us to view and eventually print as hard copy.
Essentially the older CCD technology transfers that information in a more linear fashion, which is very accurate, but is therefore slower, and also power dependent. No problem for a scanner as it is in no hurry and connected to the mains. With battery powered hand held devices however this was an issue, as the market demanded better, faster and more frugal cameras. You can see why the resources were quickly switched to the much faster, cheaper CMOS which also placed less drain on the power source. And by the relentless progress of innovation, the more they advanced these sensors, the further the CCD based ones fell behind, much like an old car model with an engine that couldn’t be upgraded.
For much the same reason, there wasn’t much point updating the related software as the basic box was out of date, and in any case photo editing programmes had progressed by leaps and bounds during the same period.
One advantage of the CCD for example was that the slower and perhaps more precise linear method produced less noise - that electrical interference often confused with grain - but as the very latest software can cancel this out without reducing clarity it is no longer a benefit.
As a photographer I have very much been a part of this sensory evolution as my first DSLR, some 20 years ago, was a Fuji S2 much loved then by wedding and portrait professionals as it produced softer, more film-like images. That used a CCD sensor with a then impressive six megapixel count, but it trashed battery life especially if you took full advantage of its top end capabilities, and had a frustrating time lag saving big files to its meagre 16mb memory card.
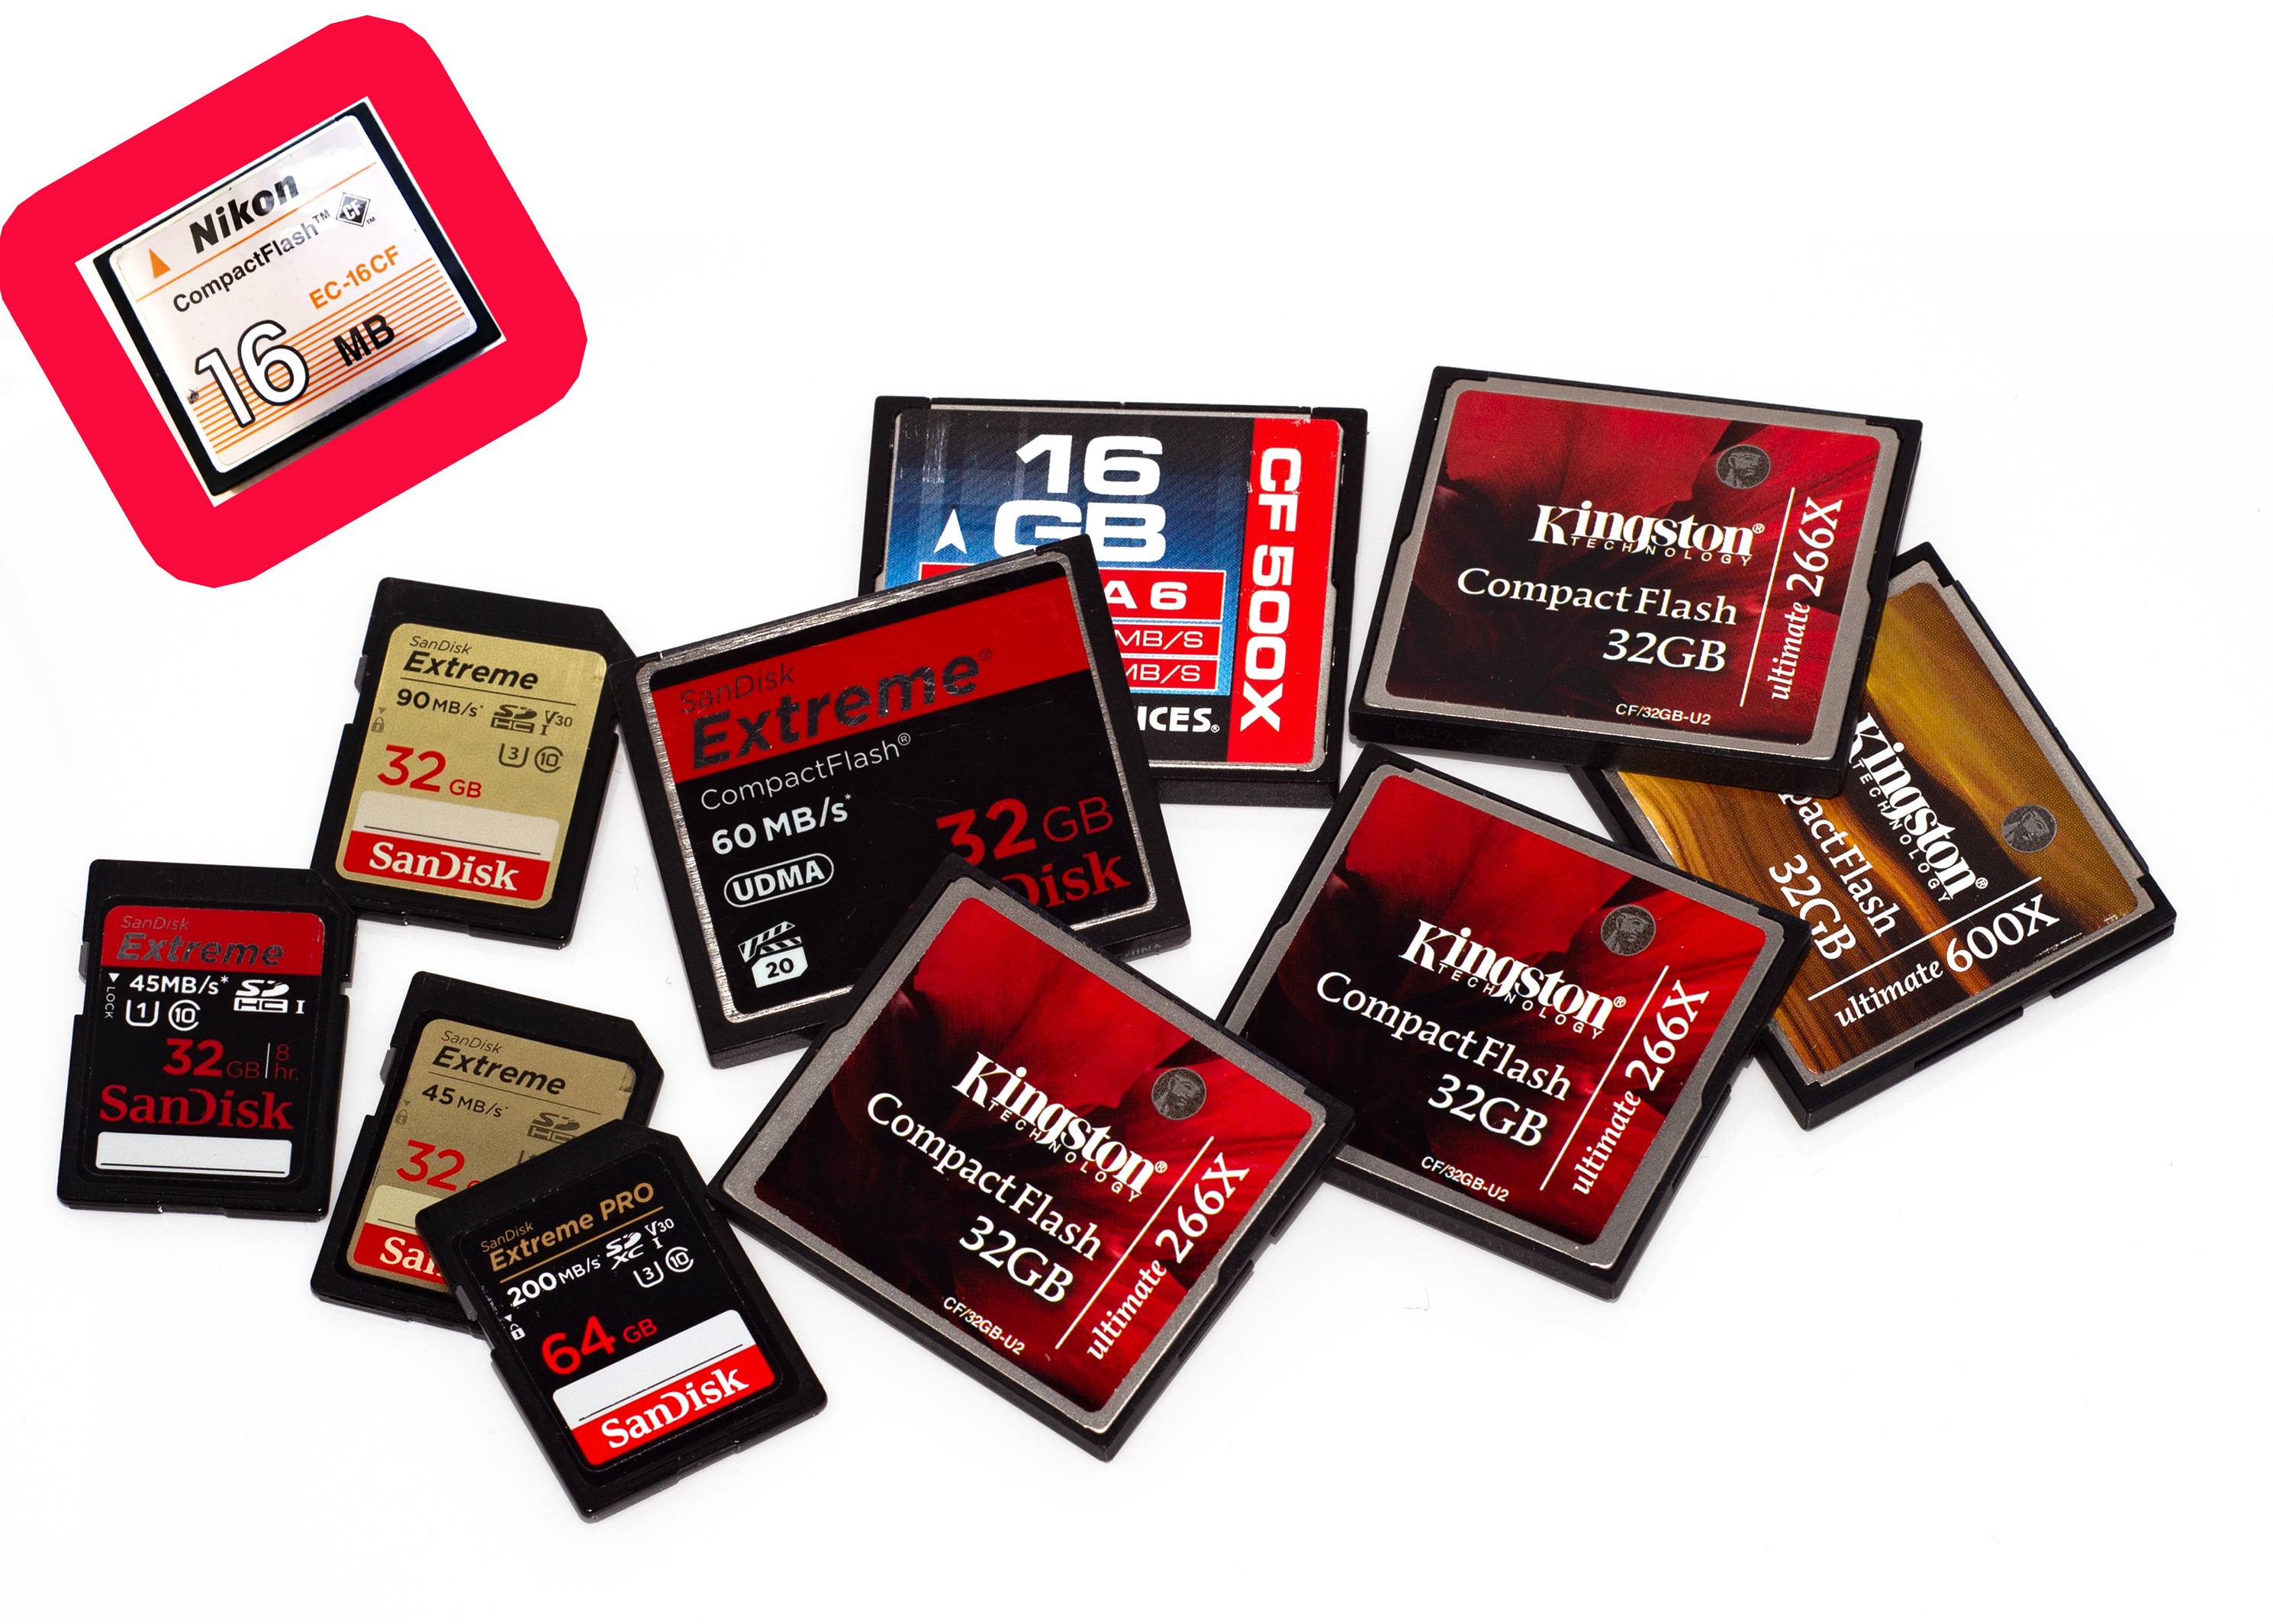
Memory card from my first DSLR in 2004 (16 Megabyte) compared to my stash for 2025 (336 Gigabyte)
Two decades on, my current Nikon D800 - not even the very latest mirrorless tech- sports 36 megapixels outputting multiple single files at effectively 300dpi A2 dimensions without even pausing to catch its breath.
Most importantly unprocessed RAW files have much more scope for adjustment and enhancement than even the best processed Tiff provided by a scanner. Obviously the scanner is still the most convenient for general users. But there is no doubt that specialist photography has overtaken the glass.
I emphasise the speciality bit as I was recently reminded of the knowledge base required when a fellow professional asked for advice on a particularly tricky job. While he was very competent at weddings and portraits, he was obviously well out of his comfort zone with something more unusual. Just having a good camera isn’t enough. Like the print business, buying the kit is the easy bit!
Image editing is much the same. Just having Photoshop doesn’t mean that you can use it properly after only basic training, as much like learning to drive, once you’ve passed your test, it’s then the proper learning curve starts. As it gets more complicated, the temptation to rely more on AI to do the thinking rather than draw on experience is hard to avoid but it’s important to understand the basics before resorting to the fancy stuff.
Many of the features of photo editing are remarkably similar to essential darkroom techniques with film, and even have the same names, but with the source being digital opens up so many more fascinating possibilities which we are all still exploring and learning from.
One of the most important is the layer. By making what is effectively an identical copy you can then perform any alterations to that without affecting the original which stays intact below, and even alter the strength of those changes by adjusting the opacity or the blend mode of the duplicate. And if you really mess up, just delete it and start again.
One of the most common issues for print is an image that is badly exposed and will print darker overall or in parts than appears on the customers’ screen. In order to avoid that awkward explanation at the counter it is sometimes quicker to make a small correction to suit the expected print output and wasted paper.
Under Image>Adjust in Photoshop the very first option is Brightness and Contrast but even Adobe says don’t ever use it, they just kept it in there so the interface looked familiar for previous users. It’s such a crude tool it’s like using a shovel instead of a spoon. Exposure, in the same column isn’t much better.
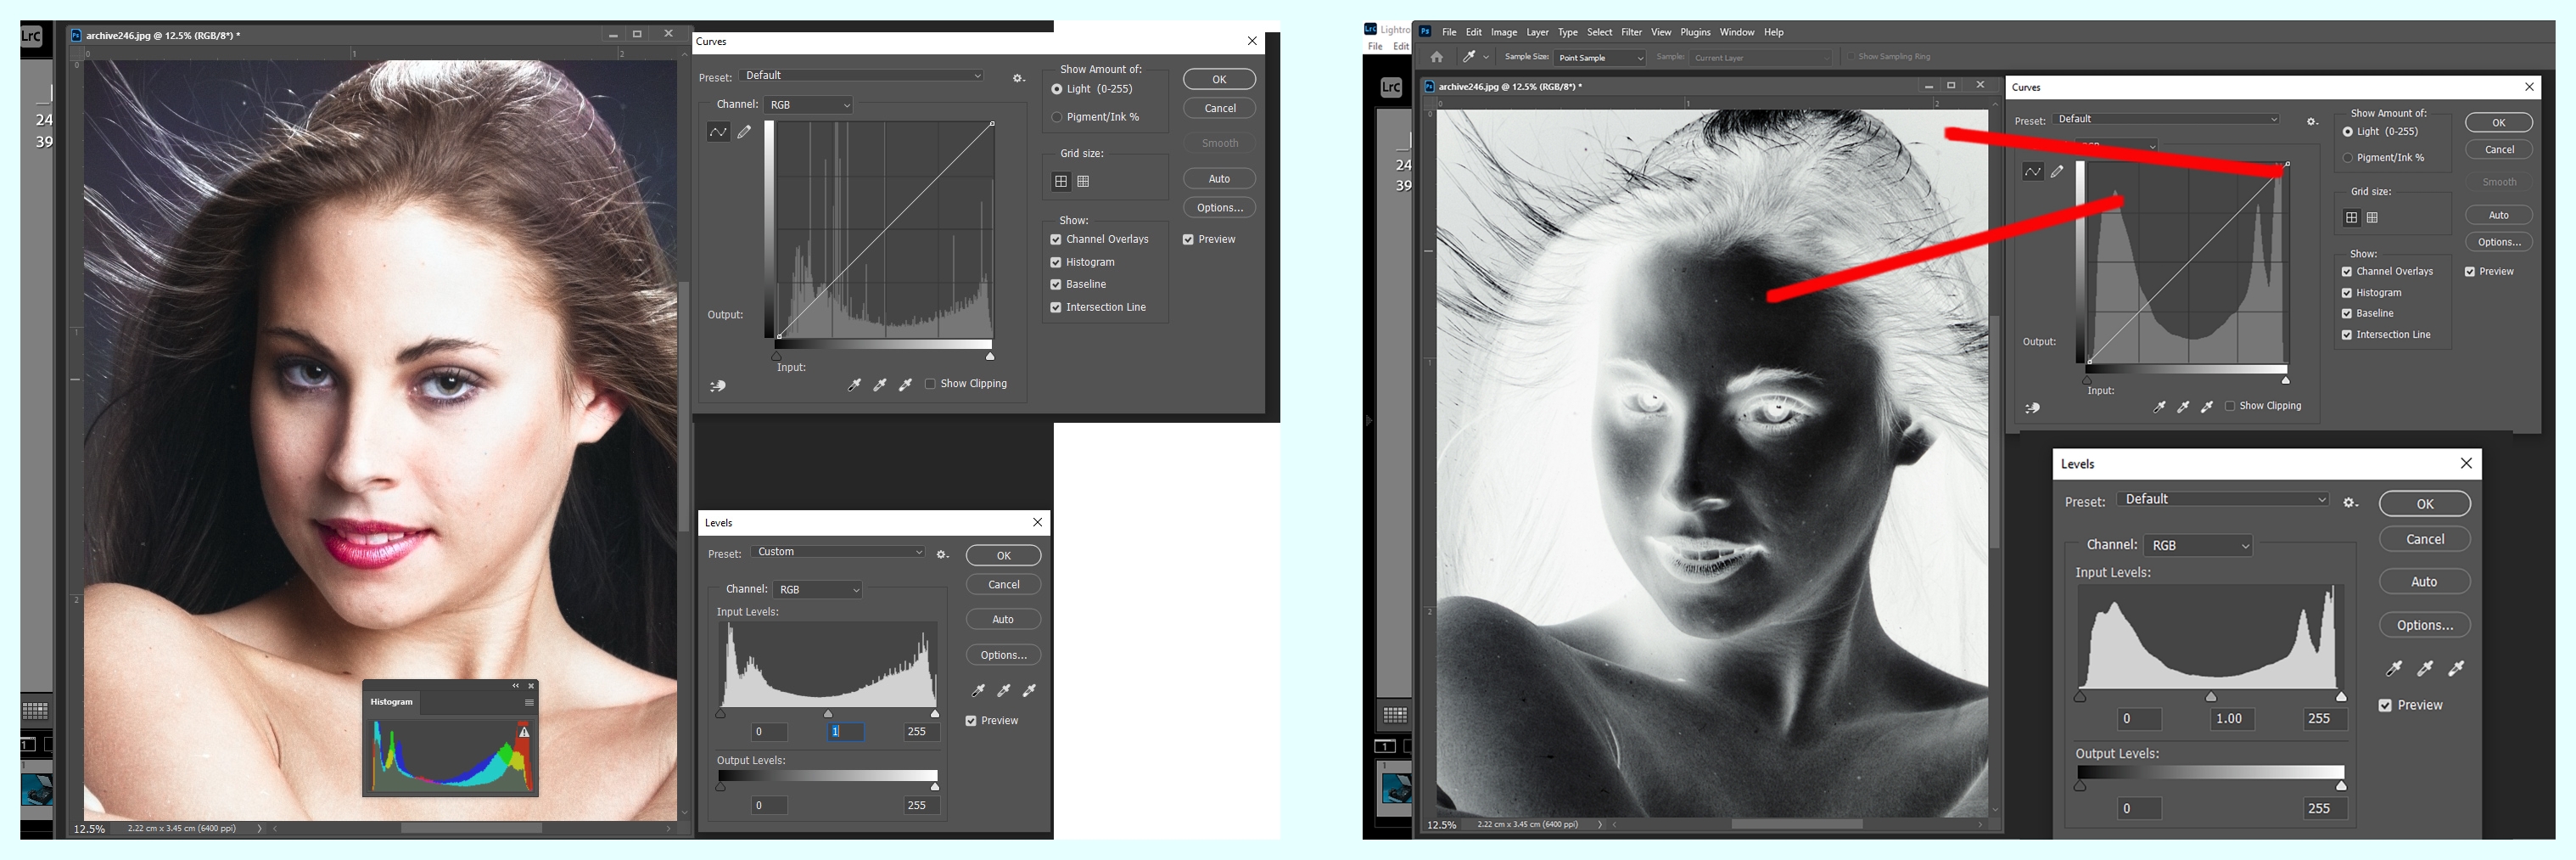
The proper tools that reveal the bare skeleton bones of a digital file are Levels and Curves. They both display the same information but in different formats and work in different ways to achieve similar results, so you can use either, it’s just that Curves is more complex and has more intricate controls. What they reveal is the histogram which may look like a lot of squiggly lines but is the digital equivalent of holding a negative up to the light to see which bits are dark, which bits are light and which are somewhere in between. At either end are the two extremes of absolute white light and total darkness. These are the two extremities where digital reproduction struggles, and the humps and troughs in between are where there is scope for refinement.
Auto correction of colour, contrast and tone will tend to level out these highs and lows but of course it isn’t always what you want, and more selective attention is often called for.
In the example of an actual black and white 35mm negative you can see the two peaks and ideal exposure would be to lower these and raise the shallow curve in between to give a more even average. But of course this is internationally a dramatic high contrast image typical of monochrome portraiture so you don’t want it to be uniform grey or it will lose the impact.
That’s where human judgement comes in to choose the amount of correction - just because you can doesn’t mean you should.
The second example is the same image but in colour revealing the different saturation of individual RGB channels which can be adjusted, and how the highlights in particular are blown out and need to be reduced to produce natural skin tones.
In order to do this you need to use layers so you can overlay the effects of levels or curves and then refer back to the original below to see what they have done. You can either just duplicate a layer or you can directly create an adjustment layer with levels or curves - Layer> New Adjustment Layer.
There are a list of other possible adjustment layers in this column but if all this is new to you I recommend starting with Levels as it is the simplest, and once you get familiar with the process you can progress to more ambitious operations.
Subtle changes are difficult to spot on a bright screen but they may make a more dramatic difference in print. It very much depends on the printer and print settings so it is very much trial and error, but the advantage is that you can make small reductions in the impact of the overlying layer by simply reducing the opacity.
There are blend modes in the layer options as well and these can be quite useful particularly with scanned documents that can be either too pale or too dense. Screen mode will make the whites whiter and Multiply make the blacks blacker in simple terms. There are other ways of correcting exposure problems but combining this with layer opacity is the quickest even if it is not the most precise.
Both Levels and Curves have three eyedroppers and these can sample the exposure across the range to establish anything that is absolute black, or absolute white from left to right much like the colour picker tool works. The one in the middle represents a medium point of 50% grey. These need to be treated with care as they are absolute reference points so that everything else in the image will be calibrated around that chosen point. So you may make a grey area pure white but desaturate most of the colour in the rest of the image.
While some of these basic actions can be heavy handed, with adjustable layers you have quite subtle control over the output if you use them carefully. It’s important to understand how these work, and why, with digital imaging before you progress too far with image manipulation and consequent printing. It was the hardest lesson we film photographers had to learn moving from the darkroom to the computer, but the basic science of light hasn’t changed, only the technology, and of course printing with inks is still pretty much unchanged despite the change from plate to processor.
The problems of mixing simple colours to create a desired composite remain even with the help of Artificial Intelligence.
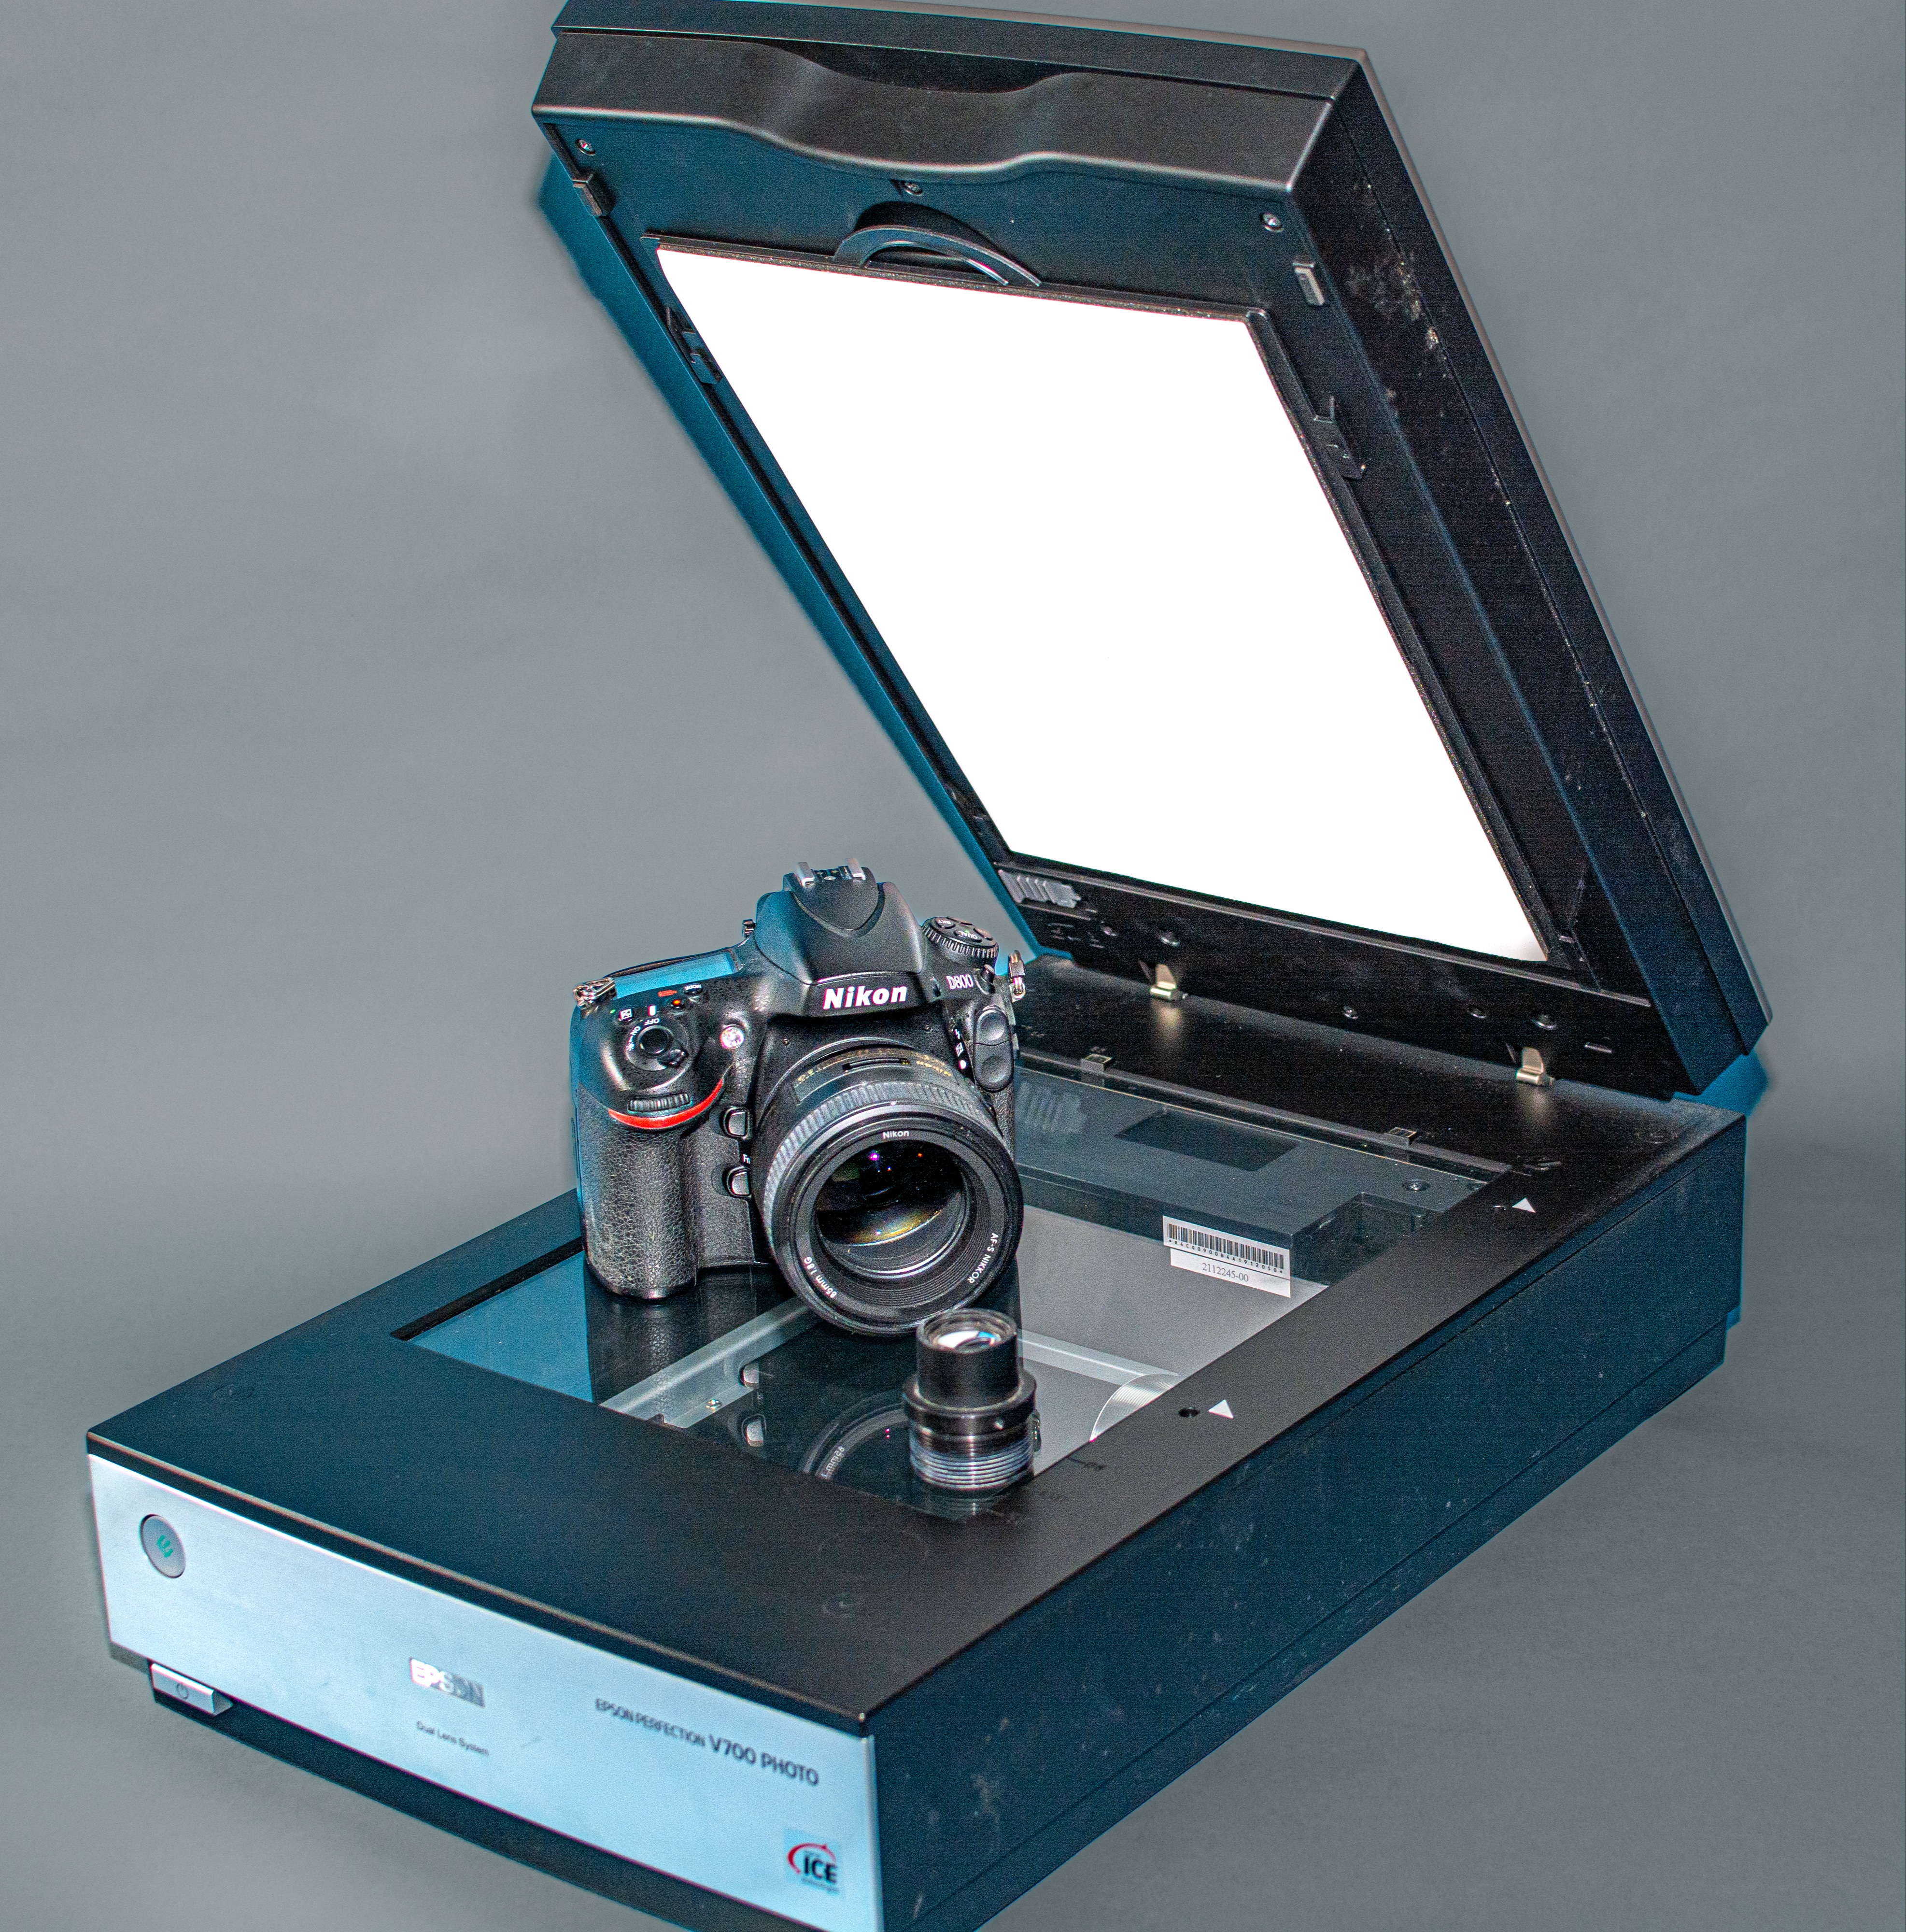
Header image: Scanner & camera pic
New and 'old' technology CMOS vs CCD


.jpg)